Ingredients
Serves 6-8 generously
- 3-3½ lbs boneless beef chuck roast
- 2 (1 oz) packets dry onion soup mix
- 2 large yellow onions, thinly sliced (about 3 cups)
- 2 cups low-sodium beef broth (warmed 1 minute in microwave)
Optional Enhancements:
- 1 tablespoon Worcestershire sauce
- 1 tablespoon tomato paste
- Fresh parsley for garnish
Equipment
- 6-quart slow cooker
- Sharp knife and cutting board
- Paper towels
- Measuring cup
- Two forks (for shredding)
- Serving bowls
- Ladle
Step-by-Step Instructions
Step 1: Build Your Onion Bed
Scatter the thinly sliced onions evenly across the bottom of your 6-quart slow cooker, creating a complete layer that covers the entire bottom. This onion bed serves two crucial purposes: it prevents the roast from scorching or sticking to the bottom, and it infuses the meat with sweet, savory depth as it cooks. Make sure the onions are sliced into thin half-moons so they caramelize evenly without burning.
Step 2: Prep the Roast
Take your chuck roast straight from the refrigerator and pat it completely dry with paper towels on all sides. This step is important—moisture on the surface will steam the meat instead of allowing it to develop even a subtle crust and deeper flavor. Place the dried roast directly on top of the onion bed in the slow cooker.
Step 3: Season with Purpose
Open both packets of dry onion soup mix and sprinkle the contents evenly over the entire surface of the roast. Using clean hands, gently press the seasoning into the meat, making sure it adheres to the surface. This isn’t just sprinkling—you’re creating a flavor crust that will develop into something incredible over the long cooking time.
Step 4: Add the Broth
Pour your warmed beef broth (warming it for 1 minute in the microwave prevents temperature shock in the slow cooker) around the sides of the roast, not directly over the top. Pouring around the sides preserves that beautiful seasoning layer you just created while still providing the liquid needed for braising. Do not stir anything together—the layers are intentional.
Step 5: Cook with Patience
Put the lid on your slow cooker and set it to LOW for 8-10 hours. Here’s the crucial discipline: do not lift that lid before at least 7 hours have passed. Every single peek releases steam and adds 20 minutes to your cooking time while disrupting the gentle, even heat that’s doing all the work. The roast is done when it shreds easily with just gentle fork pressure, the onions are translucent and meltingly tender, and the internal temperature reaches 200-205°F for optimal tenderness.
Step 6: Shred and Incorporate
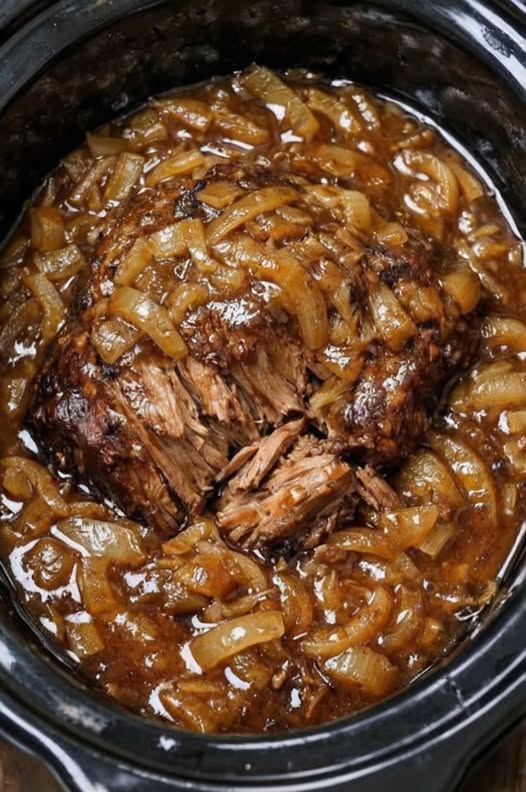
Once your timer goes off, use two forks to gently pull the roast into large, rustic chunks directly in the slow cooker. Don’t shred it into tiny pieces—you want substantial, satisfying chunks. Stir the caramelized onions and all those gorgeous juices around the meat, coating everything in that glossy, rich gravy.
Step 7: Adjust If Needed
Taste the gravy before adding any additional salt—onion soup mix is already quite salty and you likely won’t need more. If your gravy seems too thin, remove 1 cup of the hot liquid, whisk in 1-2 teaspoons of cornstarch until smooth, return it to the slow cooker, and cook uncovered on HIGH for 10-15 minutes until it becomes glossy and slightly thickened. Alternatively, you can mash 3-4 pieces of the soft onions against the side of the cooker to naturally thicken the broth.
Step 8: Serve with Soul
Ladle generous portions of the shredded beef into warmed bowls, making sure each serving gets plenty of those sweet, caramelized onions and that incredible gravy. Serve immediately while everything is hot and the gravy is silky. This dish doesn’t wait—it’s best enjoyed fresh from the slow cooker.
Pro Tips
- Chuck roast is non-negotiable. Its marbling and connective tissue are what create that silky, rich gravy as they break down. Leaner cuts will be dry and tough.
- Don’t skip patting the meat dry. Surface moisture steams instead of developing flavor.
- Warm the broth first. Cold liquid slows down the initial heating and can add significant time to your cook.
- Never peek before 7 hours on LOW. Steam and consistent heat are doing crucial work. Every lid lift disrupts the process.
- Cook to temperature, not just time. Aim for 200-205°F internal for fall-apart tenderness.
- Add Worcestershire for depth. Just 1 tablespoon stirred into the broth adds incredible umami complexity.
Variations & Substitutions
- Add vegetables: Layer 4 cups of chopped carrots and potatoes during the last 3 hours of cooking for a complete one-pot meal.
- Add tomato paste: Stir 1 tablespoon into the broth before pouring for deeper umami richness.
- Make it mushroom: Add 8 oz of sliced mushrooms with the onions for earthy depth.
- Add garlic: Scatter 6-8 smashed garlic cloves with the onions for more aromatic flavor.
- Make homemade soup mix: Combine 3 tablespoons dried minced onion, 1½ teaspoons beef bouillon powder, 1 teaspoon onion powder, ½ teaspoon parsley flakes, ¼ teaspoon celery seed, and a pinch of sugar. Whisk into broth.
- Use frozen beef: Place frozen chuck roast directly in the slow cooker. Add 1 hour to LOW cooking time. Gravy may be slightly thinner—reduce uncovered for 15 minutes at the end.
- Make it gluten-free: Use gluten-free beef broth and the homemade soup mix blend instead of packaged mix.
- Add red wine: Replace ½ cup of the broth with red wine for deeper, more complex flavor.
Serving, Pairing & Storage
How to Serve:
Ladle into deep bowls over mashed potatoes, egg noodles, or rice to soak up all that gorgeous gravy. Serve with crusty bread for mopping up every drop. Garnish with fresh parsley for a pop of color.
What It Pairs Well With:
Creamy mashed potatoes, buttered egg noodles, roasted vegetables, simple green salad, crusty sourdough bread, or soft dinner rolls. A full-bodied red wine or cold beer complements the rich beef beautifully.
Storage:
Store in an airtight container in the refrigerator for up to 4 days. The flavors actually deepen and improve overnight as everything melds together.
Freezing Instructions:
Freeze in airtight containers or heavy-duty freezer bags for up to 3 months. Thaw overnight in the refrigerator and reheat gently on the stovetop or in the microwave, adding a splash of broth if needed.
Reheating Tips:
Reheat gently on the stovetop over medium-low heat, stirring occasionally and adding a splash of broth if the gravy seems too thick. Microwave individual portions for 2-3 minutes, stirring halfway through.
Make-Ahead:
Assemble everything in the slow cooker insert (uncooked), cover, and refrigerate for up to 24 hours. When ready to cook, add 30-45 minutes to the cooking time to account for starting cold.
FAQ
Can I skip the onion soup mix?
Yes! Make a homemade blend: 3 tablespoons dried minced onion, 1½ teaspoons beef bouillon powder, 1 teaspoon onion powder, ½ teaspoon parsley flakes, ¼ teaspoon celery seed, and a pinch of sugar. Whisk into the broth before pouring.
My roast is tough—why?
Three likely culprits: it’s undercooked (needs to reach 200-205°F internal temperature), you used a lean cut instead of chuck, or you cooked it on HIGH which creates stringy texture. Use chuck, cook on LOW for 9+ hours, and verify doneness with a thermometer.
Can I add carrots and potatoes?
Yes! Add root vegetables during the last 3 hours of cooking to prevent them from turning to mush. Don’t exceed 4 cups total vegetables or you’ll steam instead of stew.
Can I use frozen beef?
Absolutely! Place the frozen chuck roast directly in the slow cooker and add 1 hour to the LOW cooking time. The broth may be slightly thinner—reduce it uncovered for 15 minutes at the end if needed.
Do I really need to brown the meat first?
Nope! This recipe is designed to skip that step entirely. The long, slow cooking develops plenty of flavor without searing.
Why does the gravy need to be thick?
Personal preference! Some people love thin, au jus-style gravy. Others want it thicker for spooning over mashed potatoes. Adjust to your taste using the cornstarch method or mashed onion technique.
Can I cook this on HIGH instead?
You can, but LOW is strongly recommended. HIGH heat (4-5 hours) tends to make the meat stringy instead of fall-apart tender. LOW creates better texture.